|
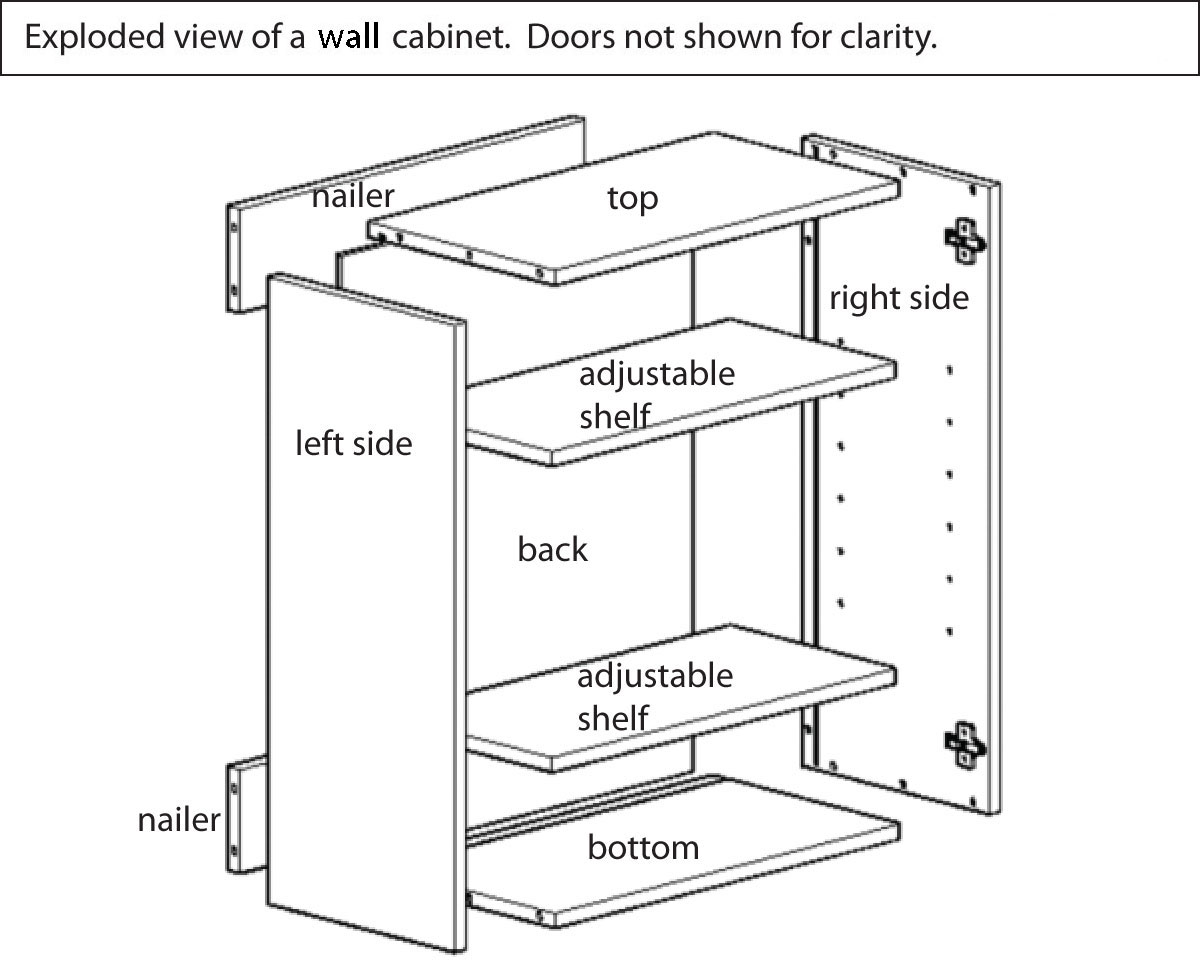
CABINET ASSEMBLY
All cabinets are doweled construction. Components are shipped with hardwood
pre-glued dowels, factory inserted You provide the final glue joint.
The tools that will be needed are a rubber mallet, wood glue or a spray bottle
with distilled water, several bar clamps or a case clamp, a hot melt glue gun and
a 5/8” staple gun.
Gather your tools and all of the components for your first cabinet. Each
component has a label that makes it easily identifiable as to which part of which
cabinet it belongs to.
Lay one of your cabinet sides with the inside face up and either fill the dowel
hole half full with wood glue or set your spray bottle to mist and spray the
dowel hole enough to coat the walls of the hole. Do not fill the dowel hole full
of water instead of misting the hole - this will over-moisten the dowel glue and
lead to a weak glue joint. If you are using water, it must be distilled to form the
neccessary bond that is needed.
Insert your pre-doweled horizontal parts (stretchers, nailers, bottom, back, etc)
into the dowel holes that you just sprayed. Press down firmly on each part to
secure it into position.
Follow the same steps for your second side as you did for your first. Then place
your second side onto the half-assembled cabinet, carefully lining up the dowel
holes with the corrosponding parts.
Once your holes are aligned, tap your side with the rubber mallet from the top
in places where the parts come together until the dowels are securely in place.
Then carefully stand your cabinet up and place into case clamp or place bar
clamps with equal pressure everywhere your vertical and horizontal parts come
together.
Once your cabinet is clamped together, use your 5/8” staple gun to secure your
1/4” back square between your back stretcher and top nailer on base cabs.
Wall cabs are fully captured and will not need to be stapled.
The final step is to apply a bead of hot melt glue to the perimeter of the back
where it has slack in its dadoed groove. This will hold the back forward so that
no gap appears from the front inside of the cabinet where the back is dadoed
in, and will also help hold your cabinet square.
Leave clamped 20-30 minutes or until the glue joint has set.
Assembly method can vary slightly from product to product, depending on how
the product is designed.
|